
Миодистрофия Дюшенна. Это словосочетание напоминает какое-то загадочное заклинание. На самом деле за ним стоит редкая болезнь и тысячи мальчишек с диагнозом, о котором часто не знают даже сами врачи.
Раньше мальчики (именно они болеют миодистрофией Дюшенна) едва доживали до 20, сейчас прогнозируемый срок жизни вырос до 35 лет. Но это в Европе. В России дела обстоят пока достаточно напряженно – есть проблемы с диагностикой и терапией. Переломить ситуацию пытаются члены благотворительного фонда «МойМио», которые помогают детям с миодистрофией Дюшенна и их семьям.
Большая проблема с диагностикой
Миодистрофия Дюшенна – орфанное (редкое) генетическое заболевание, чаще всего наследуется по материнской линии, рассказывает врач-невролог, физический терапевт и медицинский консультант фонда «МойМио» Марина Комарова.
«Иногда бывает случаи, что заболевание ни у кого не проявлялась, а впервые диагностировано у ребенка. Такая ситуация называется de novo, на нее приходится 30% случаев. Миодистрофией Дюшенна болеют только мальчики. На всю страну должно приходится порядка 2,5-3 тысяч детей. Например, в довольно большом реестре нашего фонда состоит около 300 семей, а должно быть в районе трех тысяч. Где остальные находятся – большой вопрос», – говорит врач.
Само заболевание связано с мутацией в гене дистрофина, который располагается в скелетной мускулатуре и нервной ткани, поясняет она. Болезнь проявляется нарастающей мышечной слабостью и неврологическими нарушениями в 35% случаях.
Первые признаки миодистрофии Дюшенна проявляются, когда ребенок должен учиться ходить и бегать – после полутора лет. Обычно первое, что замечают родители – ребенок не такой активный, как сверстники. Он более медленный, осторожный, у него может быть странная походка. К 10-11 ребенок может сесть в инвалидную коляску, а в 15-16 лет ему потребуется респираторная поддержка.
В список редких заболеваний миодистрофия Дюшенна попала в 2014 году. Этим особенное положение детей с таким диагнозом в России и ограничивается, продолжает директор благотворительных программ фонда «МойМио» Елена Шеперд. Как и у всех орфанных заболеваний, у миодистрофии Дюшенна есть большая проблема с диагностикой. С момента, как родители заподозрили что-то неладное у ребенка, до постановки диагноза может пройти несколько лет.

Фото: «МойМио»
Нередки случаи, когда ребенку впервые поставлен диагноз в 10-12 лет, говорит Марина Комарова. Это значит, что до этого никакой поддерживающей терапии он не получал. Хотя для того, чтобы обнаружить миодистрофию Дюшенна, не нужно быть доктором Хаусом.
Проявления заболевания достаточно характерны. С одной стороны, это задержка двигательного развития и мышечная слабость в ногах. С другой стороны, это характерный биохимический анализ крови – резкое повышение печеночных ферментов в десятки раз.
«Обычно мальчику случайно делают биохимический анализ крови и выявляют очень КФК (креатинкиназа, фермент, содержащийся в клетках сердечной мышцы, скелетной мускулатуры, головного мозга, щитовидной железы, лёгких) и ЛДГ (лактатдегидрогеназа, лактат — фермент, участвующий в процессе окисления глюкозы и образовании молочной кислоты). Ребенку ставится диагноз «гепатит неуточненной этиологии, и до пяти-шести лет его могут лечить от непонятного гепатита. Хотя других проявлений гепатита и вовсе нет», – говорит доктор.
Часто миодистрофия Дюшенна не подтверждена. Диагноз ставится клинически, но для точной поставки требуется генетическое исследование. Однако, из-за отсутствия специалистов (особенно в регионах) ДНК-тест не делается. Хотя сейчас в Медико-генетическом научном центре (МГНЦ) тест на это заболевание проводится бесплатно. Но и здесь не у всех есть финансовая возможность приехать в столицу.
Вылечить нельзя, но помочь можно
Вылечиться от миодистрофии Дюшенна сейчас нельзя, но можно в значительной степени повлиять на продолжительность и качество жизни, говорят специалисты.
Есть поддерживающие методы – гормональная и биологическая терапия, респираторная поддержка, физическая поддержка – растяжки, дыхательная гимнастика, подбор правильных технических средств, коляски, рассказывает Марина Комарова. Последнее – очень важно и сильно влияет на качество жизни.
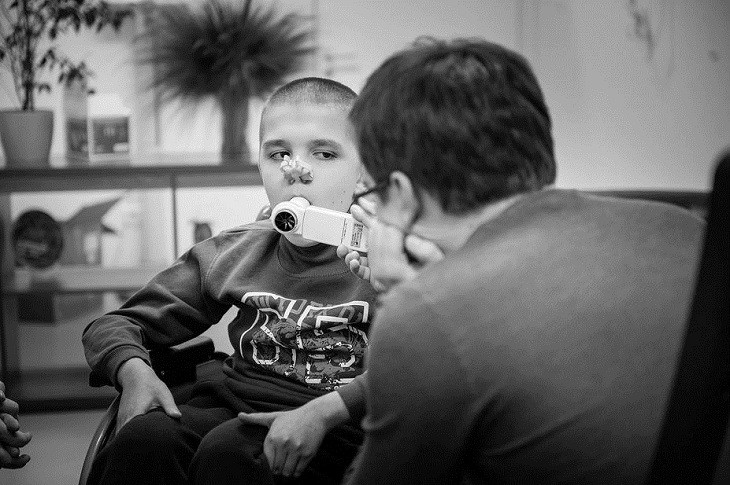
Фото: «МойМио», Клиника ММД
«Если всего этого не проводить, то у ребенка формируются уродующие контрактуры – за ним тяжело ухаживать, сложно посадить в нормальную коляску. Ребенок не может пользоваться коляской с электроприводом, например. Он обречен на то, чтобы проводить свои дни в кровати. Хотя есть возможность нормально передвигаться и вести активную жизнь», – говорит врач.
Например, в Европе удалось увеличить прогнозируемую продолжительность жизни пациентов с таким диагнозом с 20 лет (в 90-е годы) до 35 лет сейчас благодаря физической терапии, респираторной, стероидной и кардиопротекторной поддержке. В нашей стране ребята часто погибают в 12-13 лет.
То же самое с туторами, которые нужно использовать уже в 3-4 года, у нас это происходит гораздо позже. В итоге получается, что к 12 годам мы имеем ребят со скрюченным позвоночником и избыточным весом, отмечает Елена Шеперд.
По факту ведения таких пациентов нет
Главное медучреждение в России, которое занимается поддержкой детей с таким диагнозом – это НИКИ педиатрии. При этом, поддерживающая терапия требует компетенции множества специалистов – от врача генетика до диетолога. По факту у нас в стране миодистрофией Дюшенна занимается только невролог.
«Поддерживающей терапией должна заниматься целая цепочка врачей. Это и врач-генетик, который ставит диагноз, невролог, который отслеживает проявление заболевание, это кардиолог, который следит за развитием кардиомиопатии, пульмонолог, который занимается респираторной поддержкой, а также ортопед, реабилитолог, диетолог и врач паллиативной медицины», – говорит Марина Костина.
В НИКИ педиатрии такая команда сложилась. От слаженности врачей будет зависеть, как и сколько будет жить ребенок. Разрозненная работа специалистов может только ухудшить ситуацию.
В реальности ведение детей с миодистрофией Дюшенна отсутствует, продолжает Елена Шеперд. Это связано, во-первых, с дефицитом специалистов. Врачей, разбирающихся в этой нозологии, можно пересчитать по пальцам рук. Как правило, все специалисты в Москве.
Вторая причина – в России нет стандартов оказания помощи больным с редкими заболеваниями. Поэтому дети с миодистрофией Дюшенна часто крайне запущены – с контрактурами, с диким избытком веса ли, наоборот, с жутким дефицитом. Мальчишки выглядят так в 12 лет, в Европе, например, и в 30 лет нет в таком запущенном состоянии пациентов.
Фото: «МойМио», родительский клуб
«Поэтому в России, к сожалению, на озвучивании самого диагноза вся работа с пациентом и заканчивается. Но и здесь есть большая проблема – то, как об этом говорят врачи. Часто это делает довольно цинично – «ваш ребенок смертельно болен, но мы помочь ничем не можем». А ведь от того, как произносится диагноз, зависит, станет следующая стадия началом конца или либо началом пути», – говорит директор благотворительных программ фонда «МойМио».
Часто специалисты фонда находят семьи в подавленном состоянии, в затянувшейся депрессии. «Они закрыты от всех и всего, потому что им сказали, что это конец. Получается, что вся семья – мама, папа, бабушки-дедушки, братья-сестры выпадают из всех процессов. Радует, что сейчас стало постепенно формироваться понимание, что при паллиативных заболеваниях, как миодистрофия Дюшенна, помощь требуется не только ребенку, но и всей семье», – говорит Елена Шеперд.
«Мой Мио»
Ситуацию с поддержкой детей с миодистрофии Дюшенна и их семей старается изменить фонд «МойМио». Сегодня подопечными фонда являются свыше 300 детей, а это значит, что жизнь трехсот семей хотя бы на йоту изменилась в лучшую сторону.
До того, как в 2015 году появился фонд «Мой Мио», каждому из его организаторов пришлось пройти свой путь. Путь, понятный только родителю ребенку, которому поставлен диагноз «миодистрофия Дюшенна».
Елена Шеперд вспоминает, что ее сыну миодистрофия Дюшенна поставили в 2010 году. «Сценарий был стандартный. Первые признаки, я стала замечать, когда ребенок начал ходить. Были обращения к разным специалистам, но окончательный диагноз был поставлен в 6,5 лет.
Кроме ужасных слов, которые я прочла о миодистрофии Дюшенна в интернете, о самом заболевании на тот момент ничего не было известно. Я начала искать специалистов. В Волгограде (там мы жили) их не оказалось, нужно было переезжать в Москву. Единственная организация, в которой были знакомы с заболеванием, оказалась ассоциация нервно-мышечных заболеваний. Через нее удалось выйти на московскую областную нервно-психологическую больницу, где занимались этой нозологией.
Дальше я увидела пост в интернете, что некая семья Свешниковых усыновляет мальчика с миодистрофией Дюшенна. Я написала Ольге Свешниковой, что готова помочь, поделиться своим опытом. Так в моей жизни появилась семья Свешниковых – Петр и Ольга, мы быстро сдружились. Сначала организовали инициативную группу, а потом фонд».
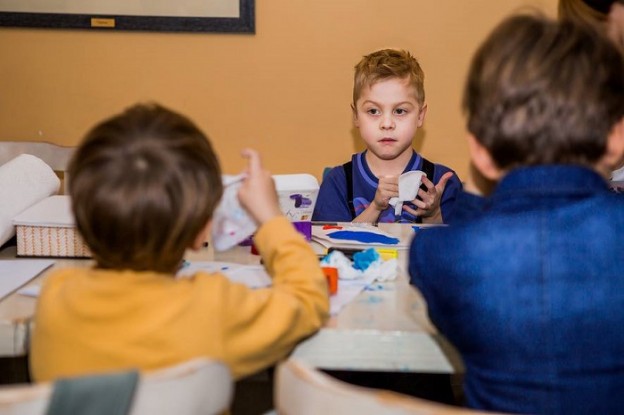
Своей главной задачей в фонде называют – объединить семьи, где есть дети с подобным диагнозом, и дать им понять, что они не одни. Сейчас в рамках фонда действует несколько программ, говорит Елена Шеперд. Первая – это психолого-реабилитационный лагерь, который в течение недели проводится в пансионате под Калугой.
Фото: «МойМио», реабилитационный лагерь
Фонд привозит туда семьи из регионов, оплачивая все – от билетов до проживания в пансионе и трансфера. В самом лагере работают специалисты, которые проводят осмотр детей. Также с семьями работают психологи.
Второе направление – медицинская программа, в рамках которой проводится Клиника МДД. Это двухдневное обследование детей по западным золотым стандартам ведения пациентов с миодистрофией Дюшенна.
«У нас есть контракт с одной из клиник в Москве, которая позволяет пользоваться помещением и оборудованием. Мы привозим туда команду врачей и восемь семей из регионов на основании обращений и данных анкет, стараясь выбрать тяжелые случаи (например, семья не получает вообще никакой помощи, нет возможности доехать до федерального центра и т д). Мы оплачиваем билеты, гостиницу и ребенок проходит полный check-up у специалистов по МДД», – говорит Марина Костина.
Не менее важное направление – образовательная программа, состоящая из информационного и образовательного модулей. Фонд адаптирует зарубежные научные материалы. Сейчас, например, занимается распространением новейших клинических рекомендаций в медучреждениях по России.
«МойМио» также пытается решить проблему дефицита специалистов. Например, неделю назад в Орле прошел образовательной модуль по физической терапии на базе детской больницы.
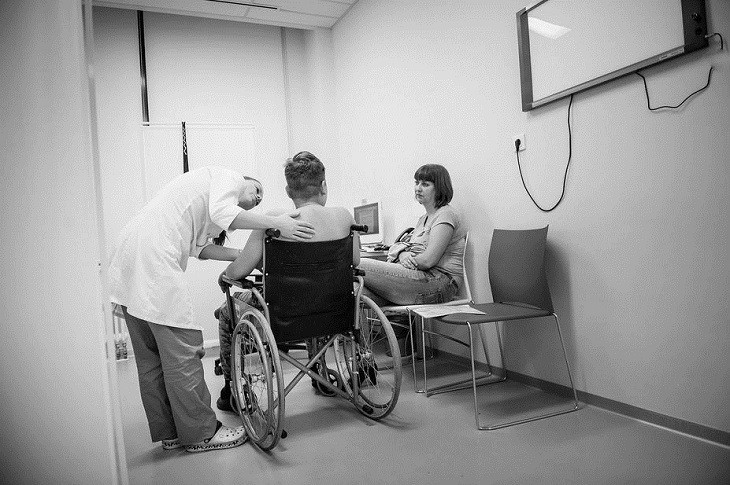
Фото: «МойМио», Клиника МДД
Есть проблема – мальчики погибают от простуды. Из-за слабости кашлевого толчка возникают трудности с откашливанием, говорит Елена Шеперд. Например, ребенок говорит, что он не чувствует проблем с дыханием, родители тоже не замечают их. Начинаем проверять, и выясняется, что у мальчика осталось 17% жизненной емкости легких. Это значит, что семья не получала помощи, ребенок не получал медицинской помощи и поддержки.
«Поэтому мы хотим обучить семьи, как действовать при простуде и подготовить специалистов по респираторной поддержке. Сейчас в городах большего сосредоточения наших подопечных пытаемся найти специалистов, которые хотят научиться этому. Фонд готов оплатить обучение», – добавляет она.
Рассчитывать на свои силы
Семьи, которые сталкиваются с диагнозом миодистрофия Дюшенна, сейчас вынуждены вести борьбу самостоятельно. Помощь, на которую можно рассчитывать от государства – индивидуальная программа реабилитации и абилитации (ИПРА). Но для этого ребенок должен получить инвалидность. Что тоже не всегда сделать просто и быстро.
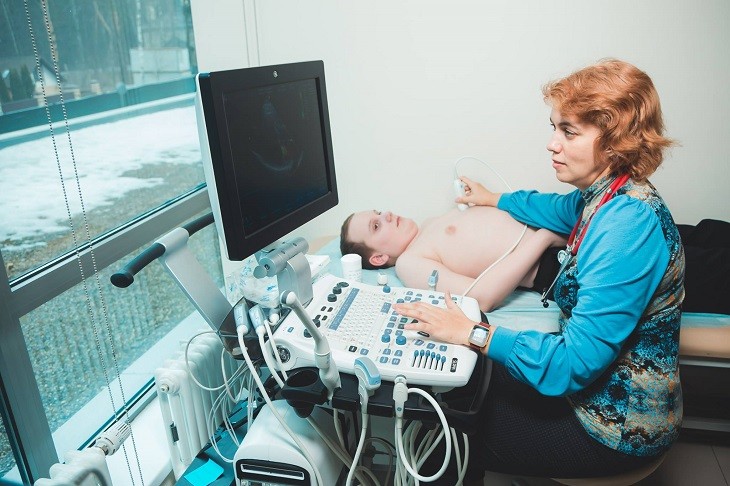
Фото: «МойМио», Клиника МДД
Если говорить о программе, то в ее рамках можно, получить технические средства реабилитации. Например, в Москве за самую дорогую коляску (электрическую) можно получить порядка 160 тысяч рублей, в регионах это 8-15 тысяч рублей.
«Что касается, остальной терапии, то все за свой счет. Например, целый список лекарств. В месяц на них может уходить до 12 тысяч рублей. Это большие деньги для семьи. Когда мальчик уже не может самостоятельно поднять стакан, маме приходится бросать работу и заниматься только уходом за ребёнком. Часто отцы не выдерживают и уходят и семьи, – говорит Елена Шеперд – Это значит, что семье придется жить на пенсию по инвалидности и пособие по уходу за ребенком».
Поэтому деньги, необходимые на лекарства, для многих являются неподъемными, не говоря уже об откашливателях и аппаратах неинвазивной вентиляции легких, стоимость которых исчисляется сотнями тысяч рублей. А эти девайсы необходимы пациенту с миодистрофией Дюшенна. В Европе опять же с этим проблем нет. Дети с 10 лет, смотря мультфильмы, дышат аппаратом НИВЛ или занимаются с откашливателем.
Есть клинические испытания препаратов, которые могут радикально повлиять на лечение. Но в России они проводятся крайне редко, и попасть на них крайне сложно. Последние пять лет не проводилось ничего. Только в феврале стартовало клиническое исследование одного препарата, способного помочь 13 процентам мальчиков с МДД, имеющим нонсенс мутацию. Хотя для семей подобные клинические испытания свет хоть какой-то надежды.
Источник: Med Vesti