OpenVPN is an excellent VPN solution for transmitting data securely over public network. Configuring an OpenVPN Server either on MikroTik RouterOS or Ubuntu Server, we can access local servers or devices from remote place using Windows 10/11, Android or MacOS.
How to configure OpenVPN Server in Ubuntu Server was discussed in the previous article. In that article, I also discussed how to create a new OpenVPN client (for Windows OS) who will be able to connect the OpenVPN Server. So, in this article I am going to show how to install and configure OpenVPN client in Windows 10/11 and how to connect OpenVPN Server from this Windows Client PC.
Installing OpenVPN Client Software in Windows 10/11
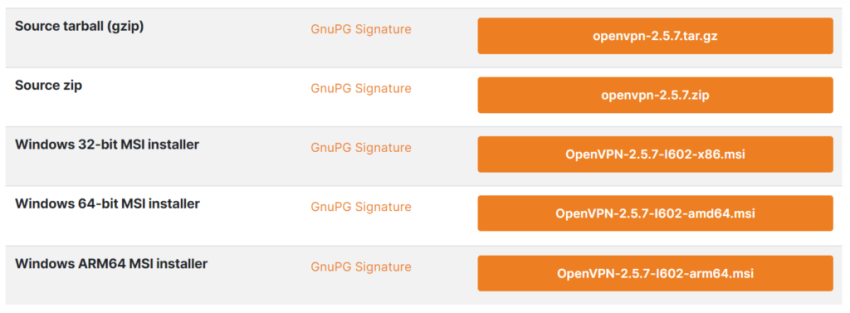
OpenVPN Client Software for Windows 10/11 can be downloaded from OpenVPN’s download page. So, Go to OpenVPN’s Community Download Page and download the software that matches with your Operating System. For OpenVPN 2.5.7, the download option looks like the following image.

I will install OpenVPN client for Windows 10. So, I am downloading Windows 64-bit MSI installer.
After downloading installer package, install the software in your windows operating system. The software installation is as simple as installing other software in Windows Operating System.
After OpenVPN client software installation, two OpenVPN network adapters will be installed like the following image. If these two adapters do not appear, OpenVPN client will not work.

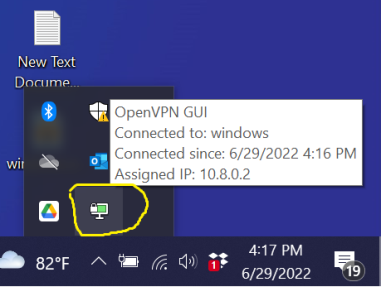
After successful installation, you will find a OpenVPN GUI icon on your Desktop. Double click on it to run OpenVPN client. If OpenVPN GUI runs successfully, a small connection icon will be found in task bar or under hidden icons bar like the following image.

Click mouse right button on the OpenVPN GUI. First time it will ask to import the client config file that was generated while installing OpenVPN Server. If you yet don’t download the OpenVPN client config file from the Ubuntu Server where OpenVPN Server has been installed, download it and then import the config file.
As soon as the config file will be uploaded, it will ask to connect the client clicking the Connect option. So, click the Connect option and if everything is OK, the OpenVPN connection will be established and the OpenVPN GUI icon will turn into green color.

You will also find the assigned IP address in your OpenVPN adapter if you keep mouse pointer on OpenVPN GUI or you can see IP information from Network and Sharing Center.
Note: If you try OpenVPN Server in your LAB or local environment, don’t forget to edit IP address in Client Config File because by default OpenVPN script will assigned public IP address. Otherwise, your test will be failure.
How to download and install OpenVPN client software in Windows 10/11 and how to configure OpenVPN client to connect OpenVPN Server have been discussed in this article. I hope you will now be able to install and configure OpenVPN client in Windows Operating System without any confusion. However, if you face any confusion, feel free to discuss in comment or contact me from Contact page. I will try my best to stay with you.