Хотя лишь немногие люди индивидуализируют внешний вид своего ноутбука или настольного ПК, некоторые одержимы этим аспектом. К счастью, Windows 10 универсальна, когда дело доходит до настройки, а смена темы позволяет одновременно изменять несколько визуальных элементов и звуковых эффектов. Вы можете изменить фон, цвет, звук и курсор мыши всякий раз, когда выбираете новую тему. Вот как изменить тему на вашем компьютере или устройстве с Windows 10.
Что такое тема Windows 10?
Тема — это не просто обои, которые вы видите на рабочем столе Windows 10, а набор настроек, которые изменяют внешний вид и звуки операционной системы. Хотя большинство тем изменяют только цветовую схему и обои, используемые в Windows 10, некоторые также могут изменять звуковую схему, внешний вид курсора мыши и даже стандартные значки рабочего стола.
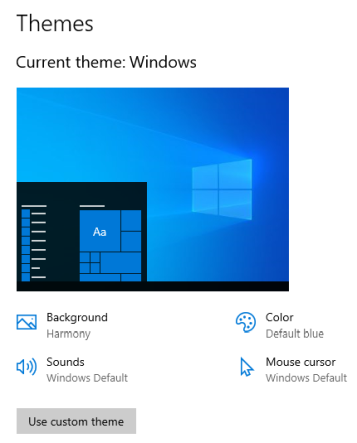
Вы можете настроить отдельные элементы, такие как звуки или курсор мыши, не меняя активную тему. Однако Windows 10 будет считать, что вы используете настраиваемую тему, как только вы измените какие-либо настройки вашей темы по умолчанию.
Как изменить тему в Windows 10
Изменение темы в Windows 10 осуществляется из приложения «Настройки». Поэтому вы либо открываете «Настройки» (Windows+I) и переходите в «Персонализация», либо щелкаете правой кнопкой мыши (или нажимаете и удерживаете) на свободной области рабочего стола и выбираете «Персонализация».
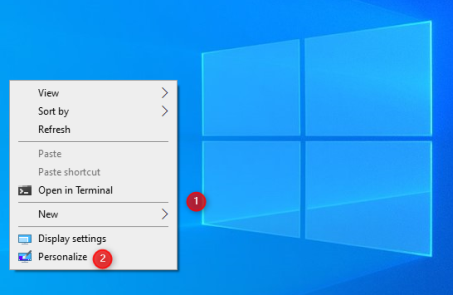
Сначала вы увидите раздел «Фон». Здесь вы можете изменить обои рабочего стола в Windows 10. Чтобы изменить тему, пропустите этот раздел и выберите Темы в столбце слева.
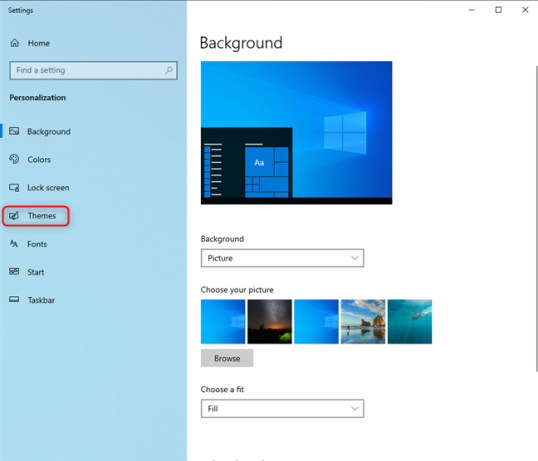
В верхней части раздела «Темы» справа вы видите элементы, из которых состоит ваша Текущая тема: ее фон, цвет, звуки и курсор мыши. Прокрутите вниз до раздела «Изменить тему», чтобы найти все темы, установленные на вашем компьютере или устройстве с Windows 10.
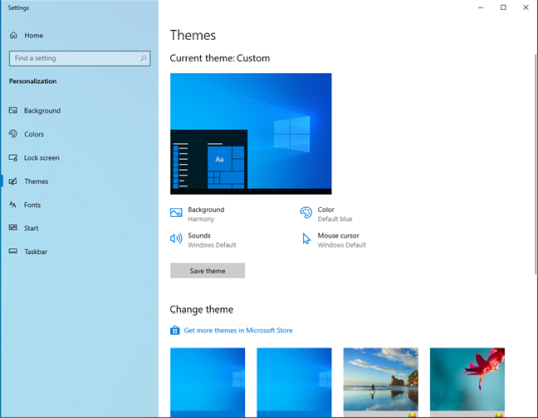
К сожалению, в Windows 10 есть только несколько встроенных тем:
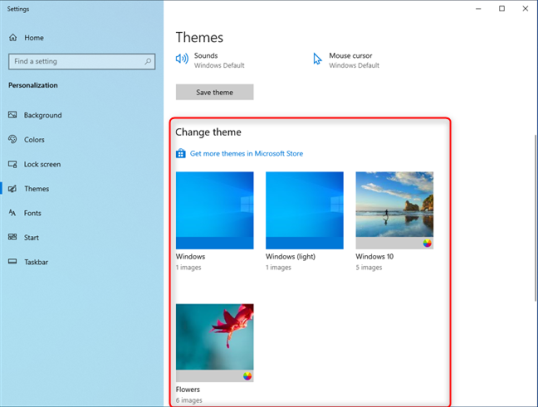
- Windows — тема по умолчанию с одним фоновым рисунком с логотипом Windows 10.
- Windows (светлая) — разновидность темы по умолчанию, которая также включает светлый режим в Windows 10.
- Windows 10 — тема, содержащая слайд-шоу из пяти красивых обоев.
- Цветы — еще одна тема с шестью обоями с цветами.
Список короткий, не так ли? О, и нет темы Dark Mode. Вместо этого в Windows 10 есть темный режим, который можно применить поверх активной темы. Чтобы переключаться между доступными темами, щелкните или коснитесь их названия.
Windows 10 сразу меняет активную тему на ту, которую вы выбрали. Новая текущая тема и все ее элементы отображаются в верхней части раздела «Темы».
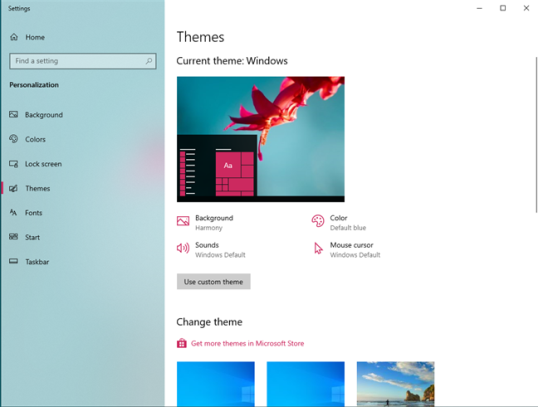
Если вы довольны своей новой темой, закройте настройки, и все готово.
Как скачать темы для Windows 10 бесплатно
Хотя вы можете искать в Bing или Google бесплатные темы для Windows 10, Microsoft также предлагает вам некоторые из них, которые можно легко загрузить. В разделе «Темы» в приложении «Настройки» прокрутите вниз до «Изменить тему». Нажмите или коснитесь ссылки «Получить больше тем в Microsoft Store».
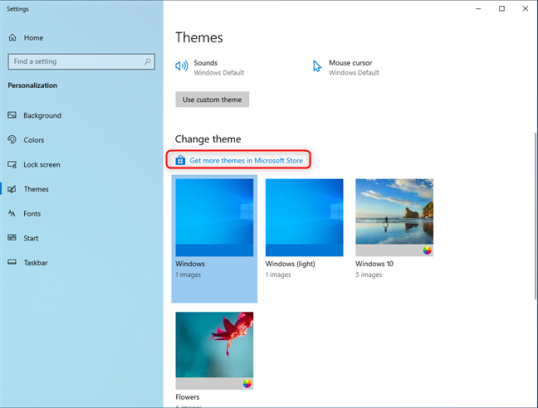
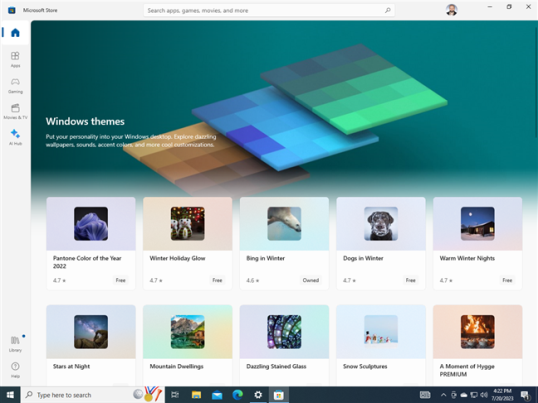
Это действие открывает Microsoft Store в разделе тем Windows, где вы найдете десятки вариантов. Просмотрите доступные. Тот, который мне нравится больше всего, находится первым в списке: цвет Pantone 2022 года. Чтобы установить тему, сначала нажмите или коснитесь ее названия.
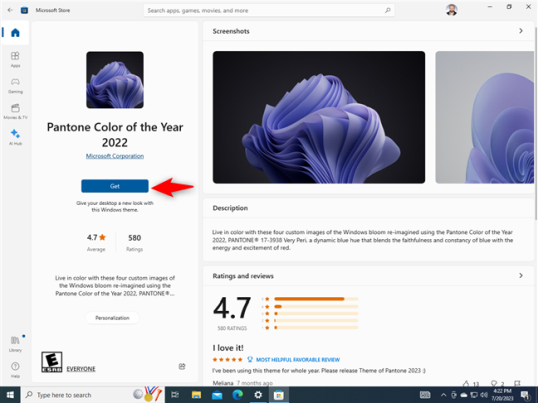
Вы видите страницу в Microsoft Store с подробной информацией о теме, снимками экрана и т. д. Чтобы ее установить, нажмите Получить.
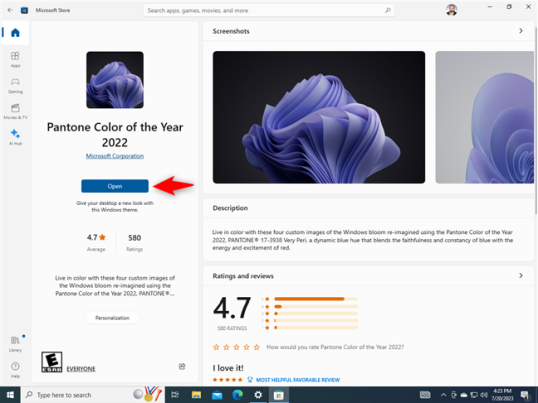
Подождите, пока тема Windows 10 будет загружена и установлена на ваш компьютер или устройство. Затем щелкните или коснитесь Открыть.
Вы вернетесь в раздел «Темы» из приложения «Настройки». Вы можете увидеть только что установленную тему справа в разделе «Изменить тему». Нажмите или коснитесь его имени, чтобы применить его.
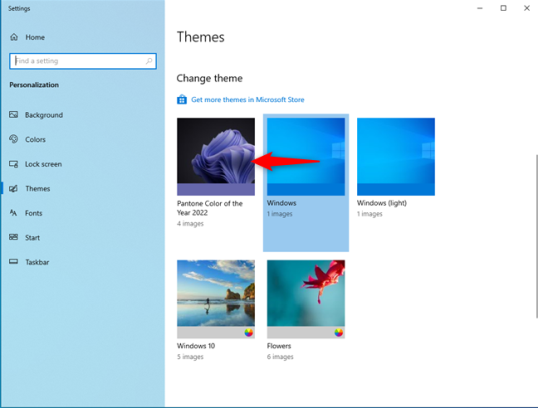
Тема Pantone Color of the Year 2022 даже круче, чем Dark Mode, который многие любят. Вы также должны попробовать это.
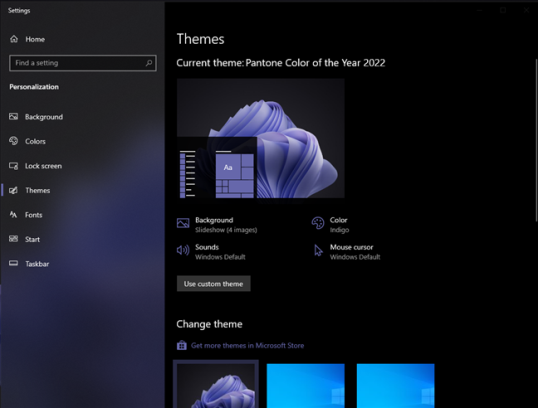
Процесс загрузки тем Windows 10 из Магазина Microsoft работает одинаково для всех доступных там тем.
БОНУС: лучшие темы для Windows 10 от Microsoft
Microsoft также создала веб-сайт с бесплатными темами, которые вы можете скачать для Windows 10 и других версий Windows. Перейти на эту страницу: Темы рабочего стола. Темы разделены на категории: животные, искусство, автомобили и т. д.
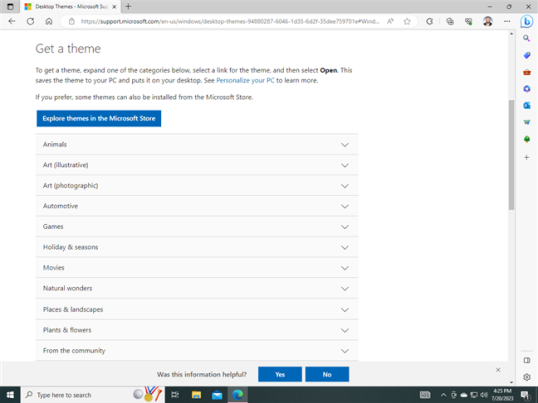
Расширьте интересующие вас категории и загрузите темы, которые кажутся вам привлекательными. Затем откройте проводник, перейдите в папку «Загрузки», и вы сможете найти там темы. Они сохраняются в виде файлов с расширением «.themepack». Дважды щелкните загруженную тему, и она будет применена автоматически.
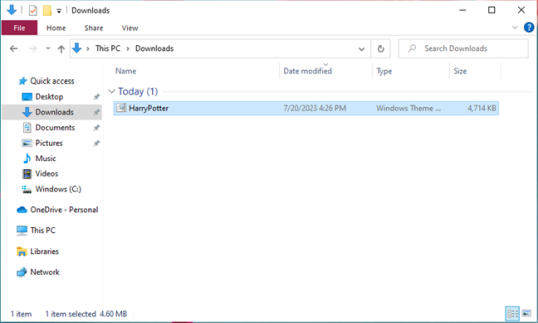
Вот тема Гарри Поттера, которую я скачал. Выглядит круто, не правда ли?

Какая тема из коллекции Microsoft вам нравится?
Как удалить тему Windows 10
Если вы скачаете и установите много тем, а потом обнаружите, что некоторые из них вам не нравятся, вы можете их удалить. Перейдите в раздел «Темы» в приложении «Настройки», как показано в первом разделе этого руководства. Прокрутите вниз до «Изменить тему» и сначала нажмите или коснитесь темы, которую вы хотите использовать в качестве текущей. Затем щелкните правой кнопкой мыши (или нажмите и удерживайте) тему, которую хотите удалить, и выберите «Удалить».
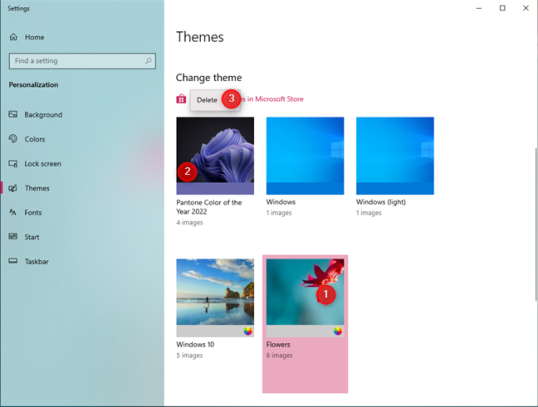
Имейте в виду, что вы не можете удалить активную тему. Вы должны сначала изменить активную тему на другую, а затем удалить тему, которая вам больше не нужна. Если вы загрузили тему в папку «Загрузки», не забудьте удалить оттуда ее файл «.themepack».
Вы нашли красивые темы для Windows 10?
Темы — отличный способ опробовать различные варианты пользовательского интерфейса, отображаемого в Windows 10. Я настоятельно рекомендую просмотреть Microsoft Store или специальный веб-сайт Microsoft и попробовать темы. Мне лично нравятся Street Views Premium и Fibonacci Sequence in Nature. А вы? Какие темы Windows 10 показались вам интересными? Поделитесь своими выводами в комментариях ниже.
