Смартфоны Android имеют порт USB, который можно использовать для зарядки, а также для передачи файлов, таких как изображения или документы, на компьютер. Хотя шаги, которые вам нужно предпринять, достаточно просты и интуитивно понятны, есть несколько вещей, на которые вы должны обратить внимание. Если вы хотите убедиться, что вы все делаете по книге, когда подключаете свой смартфон Android к ПК с Windows 10, прочитайте это руководство. Это относится ко всем Android-смартфонам, независимо от того, какая компания их сделала (Samsung, Huawei, OnePlus, Nokia, ASUS). Давайте начнем
ПРИМЕЧАНИЕ. Для написания этого руководства мы использовали Huawei P10 lite под управлением Android 8.0.0. Хотя ваш Android-смартфон может использовать другую версию Android или Samsung, или другой производитель может сделать это, все, что мы показываем, должно выглядеть и работать аналогично на вашем смартфоне.
Как подключить смартфон к компьютеру с помощью USB-кабеля
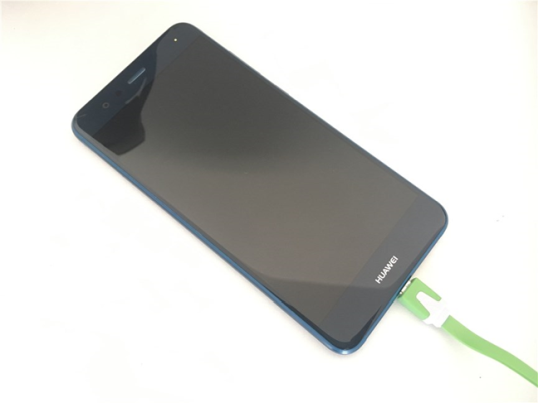
Найдите подходящий USB-кабель для подключения смартфона к ПК. Если у вас все еще есть оригинальный кабель, который вы получили со своим смартфоном Android, используйте его. Подключите USB-кабель к компьютеру с Windows 10 или ноутбуку. Затем подключите другой конец USB-кабеля к смартфону Android.

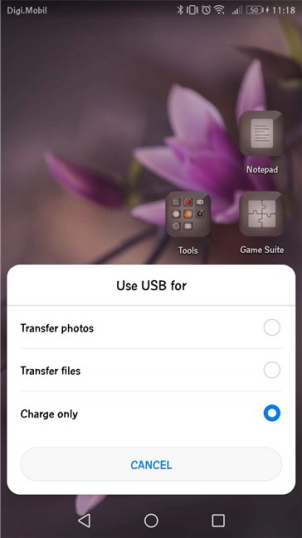
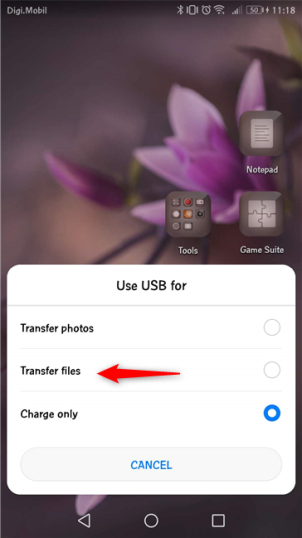
Как только вы это сделаете, ваш компьютер с Windows 10 должен немедленно распознать ваш смартфон на Android и установить для него некоторые драйверы, если они еще не установлены. Ваш смартфон также должен спросить вас, какой тип USB-соединения вы хотите: только зарядка, передача файлов или передача фотографий.

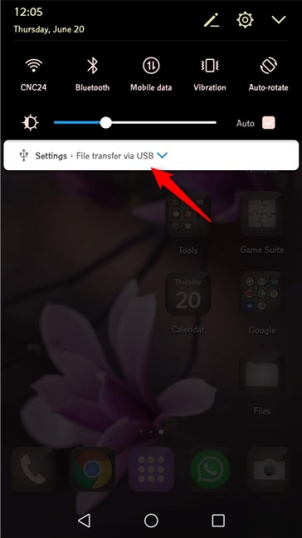
Если ваш Android-смартфон не спрашивает вас о USB-соединении, вы сможете запустить это диалоговое окно из ящика уведомлений. Проведите пальцем от верхней части экрана и коснитесь уведомления Настройки.
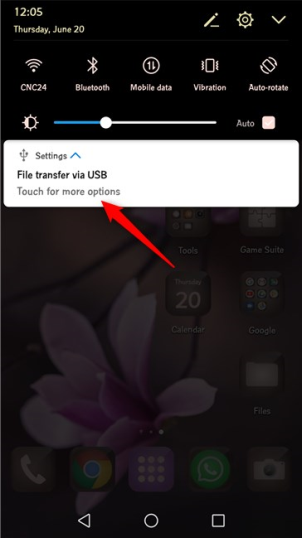
Нажмите еще раз, чтобы открыть диалоговое окно USB, чтобы получить дополнительные параметры.
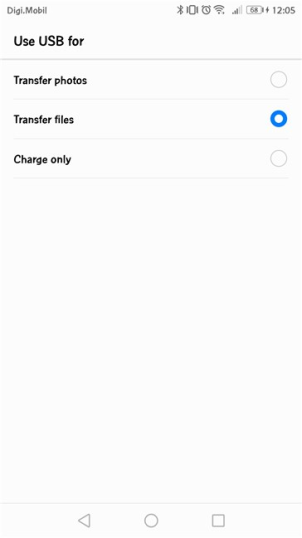
Откроется диалоговое окно «Использовать USB для». Разница лишь в том, что на этот раз он отображается на весь экран, а не во всплывающем окне.
Посмотрим теперь, что делает каждое USB-соединение:
1. Передача файлов между смартфоном Android и ПК с Windows 10 с помощью USB-кабеля
Если вы хотите передать файлы на смартфон Android или с него, выберите параметр «Передача файлов».
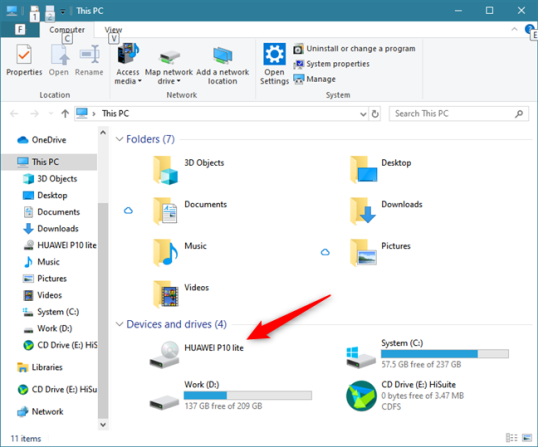
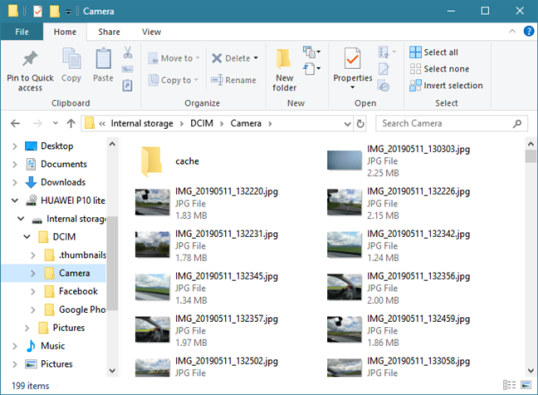
Затем на компьютере с Windows 10 откройте проводник или любой другой файловый менеджер, который вы предпочитаете. В разделе «Этот компьютер» вы увидите новое устройство с названием вашего смартфона на Android. Дважды щелкните или дважды нажмите на него.

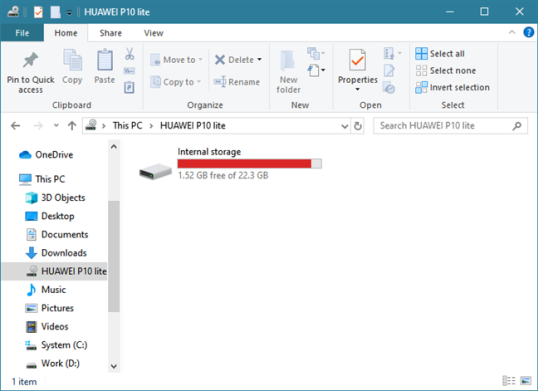
Затем вы должны найти один или два диска. Первая — это внутренняя память вашего Android-смартфона. Если у вас есть два диска, второй — это карта памяти SD в вашем смартфоне.

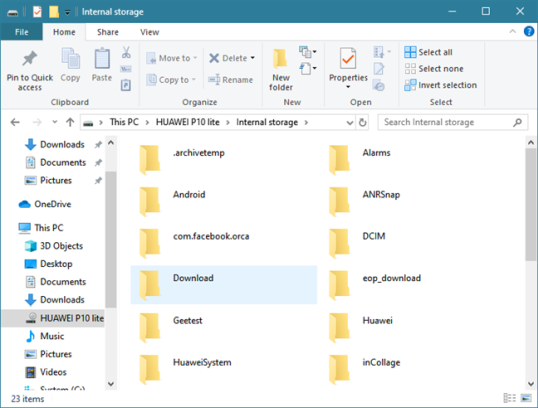
Дважды щелкните или дважды нажмите на диск, с которого вы хотите перенести данные. Это дает вам доступ ко всем папкам и файлам на вашем телефоне, так что вы можете начать передачу нужных файлов на ваш ПК с Windows 10 или с него.

Вырезайте, копируйте и вставляйте нужные файлы со своего смартфона на компьютер, как вы это обычно делаете с файлами и папками в Windows 10.
2. Передача фотографий и видео между смартфоном Android и ПК с Windows 10 с помощью USB-кабеля
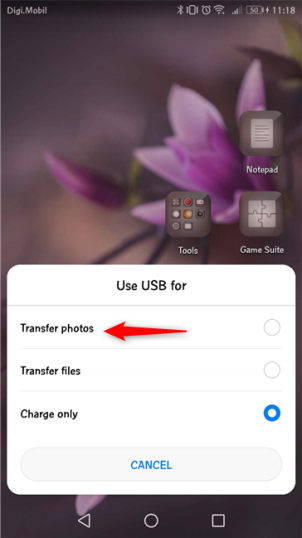
Кроме того, вы также можете выбрать для переноса фотографий на вашем смартфоне Android. Название этой опции немного вводит в заблуждение, поскольку позволяет передавать фотографии и видео.
Параметр «Передача фотографий» аналогичен параметру «Перенос файлов», но отображает только папки DCIM и «Изображения», содержащие изображения и видео на смартфоне Android. Вы видите только эти папки в проводнике.

Вырезайте, копируйте и вставляйте фотографии и видео по своему желанию на компьютер с Windows 10.
ПРИМЕЧАНИЕ. Если вы хотите передавать изображения по беспроводной связи между смартфоном Android и ПК с Windows 10, прочитайте: Отправка файлов со смартфона Android на Windows 10 с Bluetooth.
3. Зарядите свой Android-смартфон от ПК с Windows 10
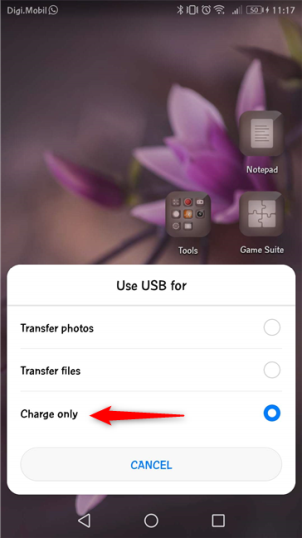
Если от ПК с Windows 10 требуется только зарядить смартфон Android, в диалоговом окне «Использовать USB для» выберите «Только зарядка».
Эта опция заставляет ваш компьютер с Windows 10 подавать электричество на ваш смартфон. Это единственное, что он делает. ПК не идентифицирует смартфон как устройство, с которым он может общаться и передавать данные.
Удалось ли вам подключить смартфон Android к ПК с Windows 10?
Не так сложно использовать USB-кабель для подключения смартфона Android к компьютеру с Windows 10. Это всего лишь вопрос выбора того, что вы хотите сделать, а затем использовать File Explorer для передачи всех видов файлов и изображений. Если у вас есть какие-либо вопросы или проблемы с этим процессом, прокомментируйте ниже и давайте обсудим.
2019-06-22T15:14:10
Вопросы читателей